Micromamba on Windows 10


Summary:
There's nothing more fun than setting up Python environments and packages. I started using Micromamba after getting angry at a previous mamba/conda/WSL installation (self-induced pain/complication). I wanted to try it in hopes of finding a simpler python environment config with steps I could share/automate with my other enterprisey team members.
5-ish Ws for this guide
What: Microconda installationWho: Anyone in need of a simple Python env configuration
Where: Windows 10 / PowerShell
A. Delete existing Conda/Mamba or related libraries
Remove Anaconda and/or Mambaforge from Windows Programs
Delete .condarc/.mambarc files from
$HOMEdirectory if no longer needed
B. Download and configure micromamba directory
Open Powershell as administrator (not to be confused with Windows Powershell)
Create the new directory for Micromamba
- For example:
mkdir \micromambaormkdir ~\micromamba
- For example:
Navigate to the new directory
cd \micromambaDownload the latest Windows binaries
Invoke-Webrequest -URI https://micro.mamba.pm/api/micromamba/win-64/latest -OutFile micromamba.tar.bz2Extract micromamba using 7-zip (or preferred unzip tool)
7z e micromamba.tar.bz2 && 7z x micromamba.tar && MOVE -Force Library\bin\micromamba.exe micromamba.exe```
Script Details
- Decompress the tarball7z e micromamba.tar.bz2 - Extract the tarball
7z x micromamba.tar - Move micromamba.exe to root
MOVE -Force Library\bin\micromamba.exe micromamba.exe Cleanup
You can delete the Library folder, .tar, and .tar.bz2 files now
Close Powershell
Create new MAMBA_ROOT_PREFIX env variable and add new folder to PATH env variable example instructions
Control Panel -> Edit System Environment Variables -> Environment Variables
Verify changes in new Powershell with following command
micromamba -v
C. Configure Micromamba for Powershell
Open Powershell as admin
Run following init script
micromamba shell init -s powershellThis will create or update powershell profile at Powershell location
- E.g.
C:\Users\_YourUserName_\Documents\PowerShell\profile.ps1
Create a new python virtual environment (I prefer the .yml config file route)
Create new yml config file in micromamba folder
      name: new-venv-name
      channels:
        - conda-forge
      dependencies:
        - python >=3.6,<3.7
        - ipykernel >=5.1
        - ipywidgets
Create the new virtual env:
micromamba create -f ./new-venv-name.yaml -y- Replace new-venv-name with your venv name
Bonus: Fancy Terminal (Oh My Posh)
If you want to wow coworkers with your shell scripting setup, then checkout Oh My Posh for Windows terminal app
I like to create a dedicated Windows terminal profile to avoid having to wait an extra 3 seconds for terminal to boot and conda to activate (micromamba does activate faster than conda)
- Example config for terminal as it was confusing my first time around:
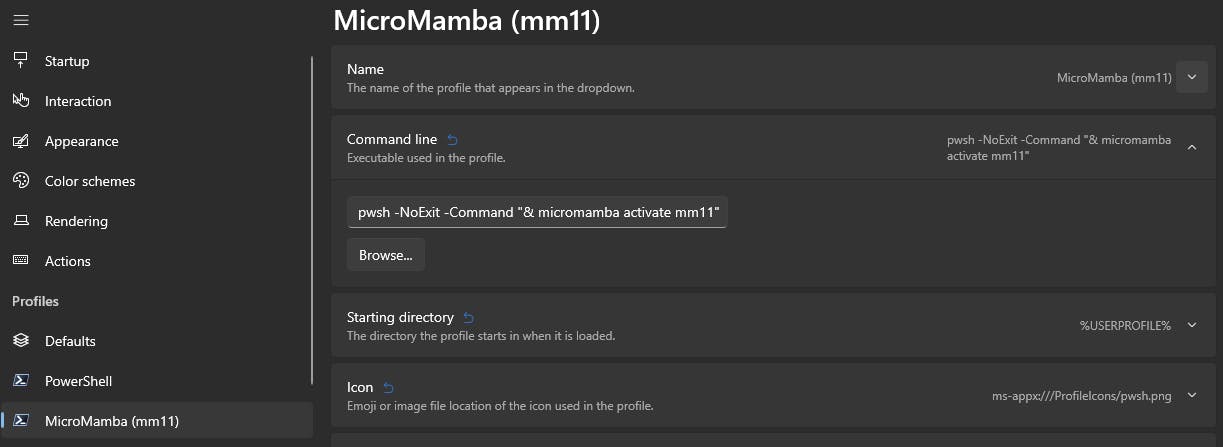
1. Open terminal settings:
ctrl + ,2. Edit command line:
pwsh -NoExit -Command "& micromamba activate new_venv_name"- Replace new-venv-name with your venv name
Congrats! You now have a normal powershell prompt and a dedicated micromamba terminal